Welcome to the Tea for Teal blog!
Thanks for reading! Here you'll find a random assortment of sewing projects, food, make-up reviews, the occasional book and movie review, my travels, and anything else that pops into my head!
If you like something please feel free to 
Monday, January 30, 2012
Paper Tape Dress Form - Related Links
Paper Tape Dress Form - Related Links
Here are all the links I used to research making my dress form.
I had done a duct tape dress form before and wasn't pleased. So I researched other methods.
This website is great for the different possibilities in making a dress form.
Threads: Clone yourself a fitting assistant
After reading all the methods the paper tape dress form seemed by far the best option. Here is the direct link:
Threads: Paper-Tape Dress Form
Here is the other two blogs I read specifically about the Paper Tape Dress Form.
I like this one because it shows how well you can do crosshatching:
Jejune Blog - Paper Tape Dress Form
This one was references in the above blog. While it is good for the clear step-by-step instructions I think the breast areas shouldn't besquared off like it was done. Made the breasts look weird to me.
Instructables: Custom Dressform
Hope these links help! Good luck with your Paper Tape Dress Form!
Paper Tape Dress Form - Chapter 3
Paper Tape Dress Form - Chapter 3
Longevity is the name of the game!
 |
| The Aftermath! |
PATCH & REMOVE

Once the form is cut off you, if you’ve done it right (remember at least two layers of papertape is needed), the shape will still retain its form. Now you need to patch up the cut in the back. This is easy to do with short wide patches.

Then gently take out the turtleneck underneath. Be careful as the papertape will want to cling to the turtleneck.

REINFORCE
This is what the inside will look like after the turtleneck as been removed…kinda jacked.

Some blogs recommend a plastic insulator spray that hardens but others complain that it dissolved the tape. I think the smartest moves is to use all the extra papertape. You will have a lot left over, it’s easy, you’ve already bought it, and it’s a good way to strengthen the form without making it super heavy.
So, that’s what I did. I put about another 5 layers on. The first inside layer should be in smaller strips and crosshatched. After that, bigger and bigger strips laid in different directions is good. By the end you should have a very stiff, sturdy form that is nice and smooth on the inside.

SPRUCING
Spruce up some of the outside areas without adding to much thickness. For sure make the neck nicer with little strips.

Also, for my form, the shoulders.
 |
| Before |
 |
| After |
COVER
I bought two of the same turtlenecks, one for cutting and one for the sewing form. Thin jersey material or something similar for the form will make it easier to pin cloth and patterns on to. Here it is!


Friday, January 27, 2012
Paper Tape Dress Form - Chapter 2
Paper Tape Dress Form – Chapter 2
The Taping!

 Annette, my boss, did the actual taping. She has a good eye and I thought she would do the project well without rushing. Plus she’s fun!
1. BASIC OUTLINE: Annette got the paper taping technique down on the second strip.
 We started with doing the first basic crisscrosses on the bust line, back, and around the midriff. She first filled in my upper back and shoulders. We used mostly long medium and thin strips, crisscrossing them. Crosshatching is really important to the forms structural integrity. This part was fairly fast.
2. UNDERARMS: If we were to go back and do this again we would have done the underarm much higher, more shaped, and stronger in the initial stages rather than after. Instead it was toward the end when I wasn’t able to lift my arms very high. Wide short strips suit the side part and smaller strips to shape the armhole better.

 -We ended up cutting between the breasts to make it shape better.
4. LOWER BACK: This part was the worst! I have an old lower back injury and being frozen into one particular shape was torture. If I did this again (and if you too, dear reader, have back issues) I would do the butt and front area first and the lower back last. At any rate, larger longer strips wrapping from the front to the back and vice versa was used.

 5. HIPS/BUTT: Almost done! This was done quickly with several big strips crosshatching on the butt area. Then I was wrapped mummy-style from front to back with wide horizontal strips. Annette taped me all the way to mid-thigh. You could probably stop right under the butt but I liked the extra length.


 6. Optional: SHOULDERS: Finally! I hated waiting for this last part but I was determined to get the shoulders in too. Most paper-dress forms I’ve seen end before the shoulders and they just get the shape of the armhole. However, I want to do lots of shirts and dresses with nice sleeves fitted to my shoulders. At this point, Annette was running out of time and I was desperate to get out of my paper tape coffin. So she just ran some big medium sized strips vertically down far enough to get the shape and I strengthened them later.
Here is the final product before cutting…


 7. Time to CUT! The best way is to make two cuts, one from the bottom and one from the top. Annette did the two cuts and was just about to free my lower back when her phone rang! ACK! Luckily she kept it quick and with one or two more cuts I was free!
Hindsight is 20/20
A few things I wish we had done differently.
- Do the armholes early on BEFORE you get locked in and can’t raise your arms well.
- If you have back issues do that area last. For example, my lower back sucks so that should have been done last.
- If you have more time and patience I suggest using smaller, crosshatching strips for the entire form as it makes a huge difference in getting your correct shape and structural integrity. As it was, I still got a great shape and we kept it to 2 hours. I don’t think I could have stood any longer anyways!
- After the fact, I would have done the neck even higher than I asked Annette to do originally as I would have had the option to do even higher necklines and chokers. Although, I could probably do a separate pieces myself and just add it on.
 *Note: walking around for a photoshoot in this thing will lead to some VERY odd walking!
In the next chapter we have the steps for after the form has been cut off. Stay tuned!
Wednesday, January 25, 2012
Paper Tape Dress Form – Chapter 1
Paper Tape Dress Form – Chapter 1

I bought some Duck brand Reinforced Gummed Tape that is water activated. One roll was 2.75 inches wide and 375 feet long. I think it was about $10 including shipping. There was some gummed tape at the local art shop but the reinforced kind is much stronger.


You can see the crossed lines; these are small strings that are used to reinforce the tape. The shiny side is the gummed side. It simply needs a damp rag run across it to activate the glue. You only get one chance to wet it and stick it down so get it right the first time around.


Prepare all your strips ahead of time. This is somewhat time-consuming and you will need different lengths.

In the end I cut 5 different sizes.
 Smallest to largest (WxL):
0.5” x 3” = 85 - too be used for small curvy areas such as breasts, collar bones, neck, etc
3” x 4.5” = 36 - thought these might be useful for flat small areas but we didn’t really use these
1.5” x 6” = 240 - used for crosshatching, although most of these were used for strengthing the inside of the form
1.5” x 18” = 14 - long thin strips for taping off the main areas such as between the breasts, midriff, waist, etc.
3” x 18” = 12 - Wide flat areas. However, we never used these. Instead we cut them into fours to make long, thin strips for the back area.
Although you’ll want to prepare lots of strips you’ll find that you will need to make a lot more in various sizes etc as it crops up.
Now, set up your workstation.

- Hairdryer - to help with the drying process but we never used it. The tape sets quickly.
- Scissors
- Measuring tape – just in case
- Roll of tape – you’ll need to cut more as you go along
- Damp rag
- Pre-cut strips
- Long, form fitting, turtleneck – A turtleneck is best but buy it one size too small so it fits you skintight.

 Here it is on. It fit me like a glove although I probably should have tugged it down before I took the picture since it looks a bit wrinkled. However, you can easily see my body curves.
- Optional: I created a little sketch with where strips can go. This was to help me and my taper visualize the project.
- Optional: Snazzy socks for warmth and pizzazz.
Next Chapter will be on the actual process of applying the tape and shaping it to your body.
Sunday, January 15, 2012
Owl Apron
Owl Apron!
As a Christmas present for my apron-loving boss I decided to make her the owl apron I have secretly been craving.
As a Christmas present for my apron-loving boss I decided to make her the owl apron I have secretly been craving.

This fabulous fabric was made by Ceanirminger on Spoonflower.com as part of the one-yard apron pattern contest. Ceanirminger always has beautiful fabric and she is hands-down my favorite designer. I was glad to get an excuse to buy this.

Here it is! Freshly ironed and placed lovingly on my floor. The detail and color are fantastic on the piece. It is just as beautiful in person as in the picture, even on the (relatively at $18 a yard) cheap quilting fabric. I can only imagine what it would look like on nicer fabric though.
I found the printed instructions a little hard to follow, but since I’m not a beginner and common sense is really all you need to put the pieces together anyway, it wasn’t too difficult to figure it out.

The two long “wooden” top pieces will both be sewn in half to create the tie-arounds.
The middle piece with the baby owls will get sewn onto the apron piece just as it’s laid out with the two side wooden pieces as it’s backing.
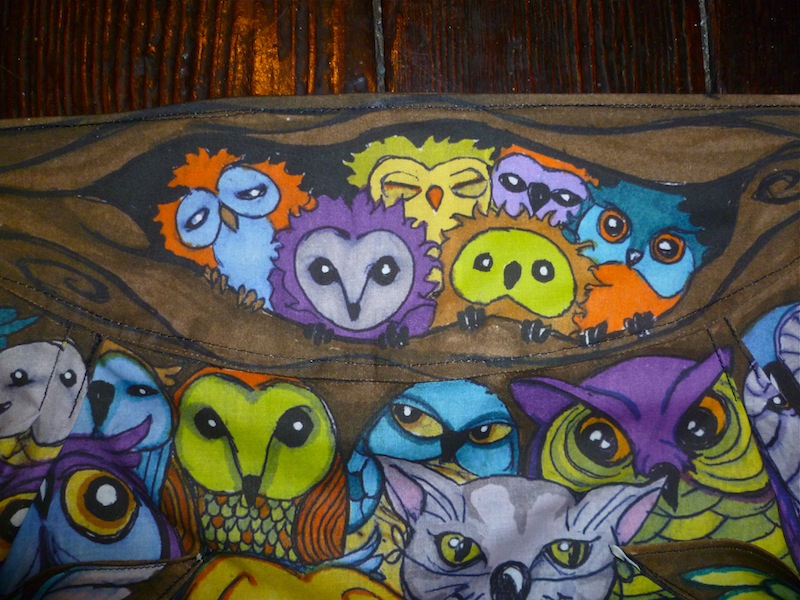

 Ceanirminger thoughtfully put dotted lines on the apron where the pockets will get sewn.
 The bottom feathers just need to be matched to the appropriate owl.


On a special, cute, note are the pleats on the side. Here are the instructions:
And here are the helpful pictures:

What an adorable, and suitable, way of showing the pleats! It’s touches like these that really make projects like these so fun and designers like Ceanirminger so great.
Here is what it looks like front and back.


Now, it’s on!
Front:


Back:


I really want to make my own but make it into a skirt.
Put it on the project list!

 The hard work paid off! My boss loves it and here she is modeling her new apron!
SO CUTE!
Subscribe to:
Comments (Atom)